How to Create Instances
This guide follows a completed order on 30 October 2026: Istanbul Shared 2, monthly billing, Ubuntu 24.04 and an SSH key. The resulting server was accessed with OpenSSH. The order used existing account credit; a card or bank payment was not part of this test.
Create an Instance in the Control Panel
First create and verify your account. Sign in to the cloud panel and choose New VM or Create New VM. This opens Create a VM. Check your billing details and available credit before submitting an order.
Choose Region
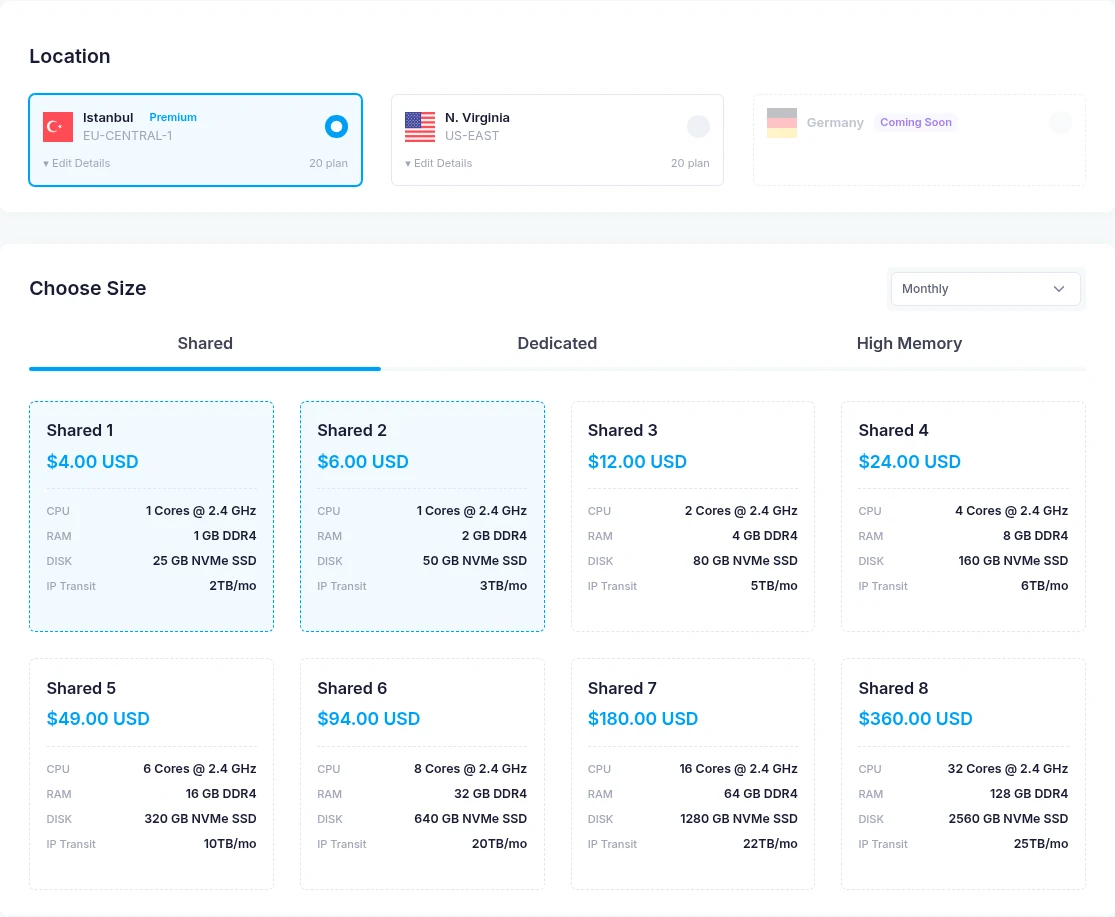
Under Location, choose an available region. The recorded order used Istanbul. A region marked Coming Soon is not an available deployment choice. Available plans and images can change when you change location, so recheck the remaining selections.
Choose Size
Select a plan family, a plan card and the billing cycle. Our Shared 2 / Monthly selection listed 1 CPU core, 2 GB RAM, 50 GB NVMe SSD and 6 USD/month before tax. This is a dated example; use the current published price list and the final order total when making your own purchase.
Additional Storage
The form has Additional Storage → Add Volume. Our order kept the included 50 GB disk and did not add a volume. If you add storage, review its size and any change to the order total before continuing. Separate volume creation and automatic formatting were not tested in this walkthrough.
Choose Authentication Method
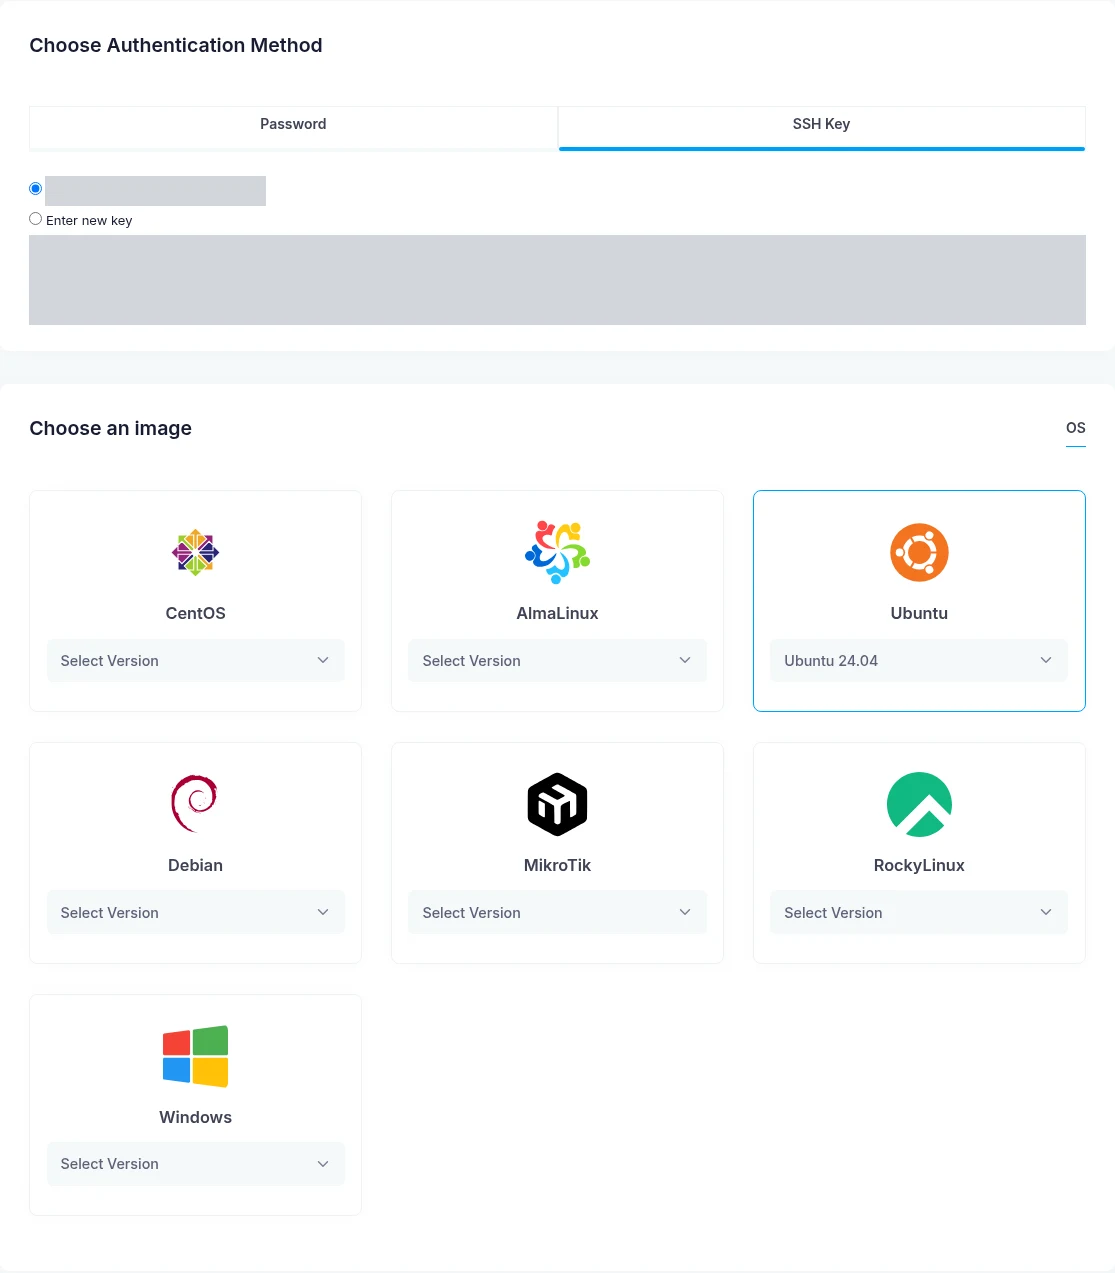
Open SSH Key under Choose Authentication Method. For a new key, use Enter new key and paste the complete OpenSSH public key. Keep the private key on your own computer. If the account already has saved keys, select the intended key; the new-key text box can remain disabled until the new-key option is selected.
Our first order added a dedicated Ed25519 public key, and login with its matching private key succeeded. The SSH guide covers key creation and the first connection. The Password option is also visible, but password-based SSH login was not exercised in this test.
Choose an Image
Under Choose an image, open an OS family's Select Version list and choose an explicit version. Our selection was Ubuntu → Ubuntu 24.04. The installed system reported Ubuntu 24.04.5 LTS. Clearing the version clears the OS selection; choose a valid version before proceeding.
Review and Pay
- Review Client Information, including the billing contact and country. Enter notes only if needed.
- Read the Terms of Service and Privacy Policy, select their checkboxes and press Continue.
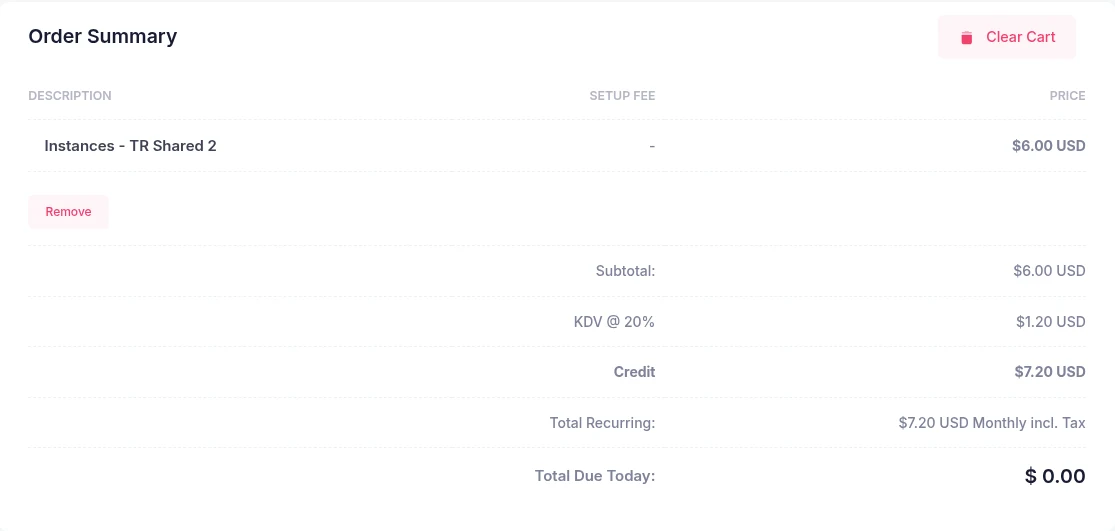
- On Order Summary, check the product, billing cycle, tax, applied credit, Total Recurring and Total Due Today. The first page has not completed the order yet.
- Review the billing contact and the terms on this final page. Press Check Out once, then inspect the resulting invoice and service before retrying any submission.
In our completed order, the subtotal was 6.00 USD, tax was 1.20 USD (20%), and the recurring total was 7.20 USD/month. Account credit covered this amount, so Total Due Today was 0.00. A zero amount due today does not mean that the VPS is free. Tax and account currency depend on your account and order; see billing.
Find the Ready Server
Open Instances → Instances view, select the new service and wait for provisioning to finish. Our service first appeared as Pending, then Active. The service page shows OS Information, Network Information and Login Information. Copy your server's own IP and use the username shown there.
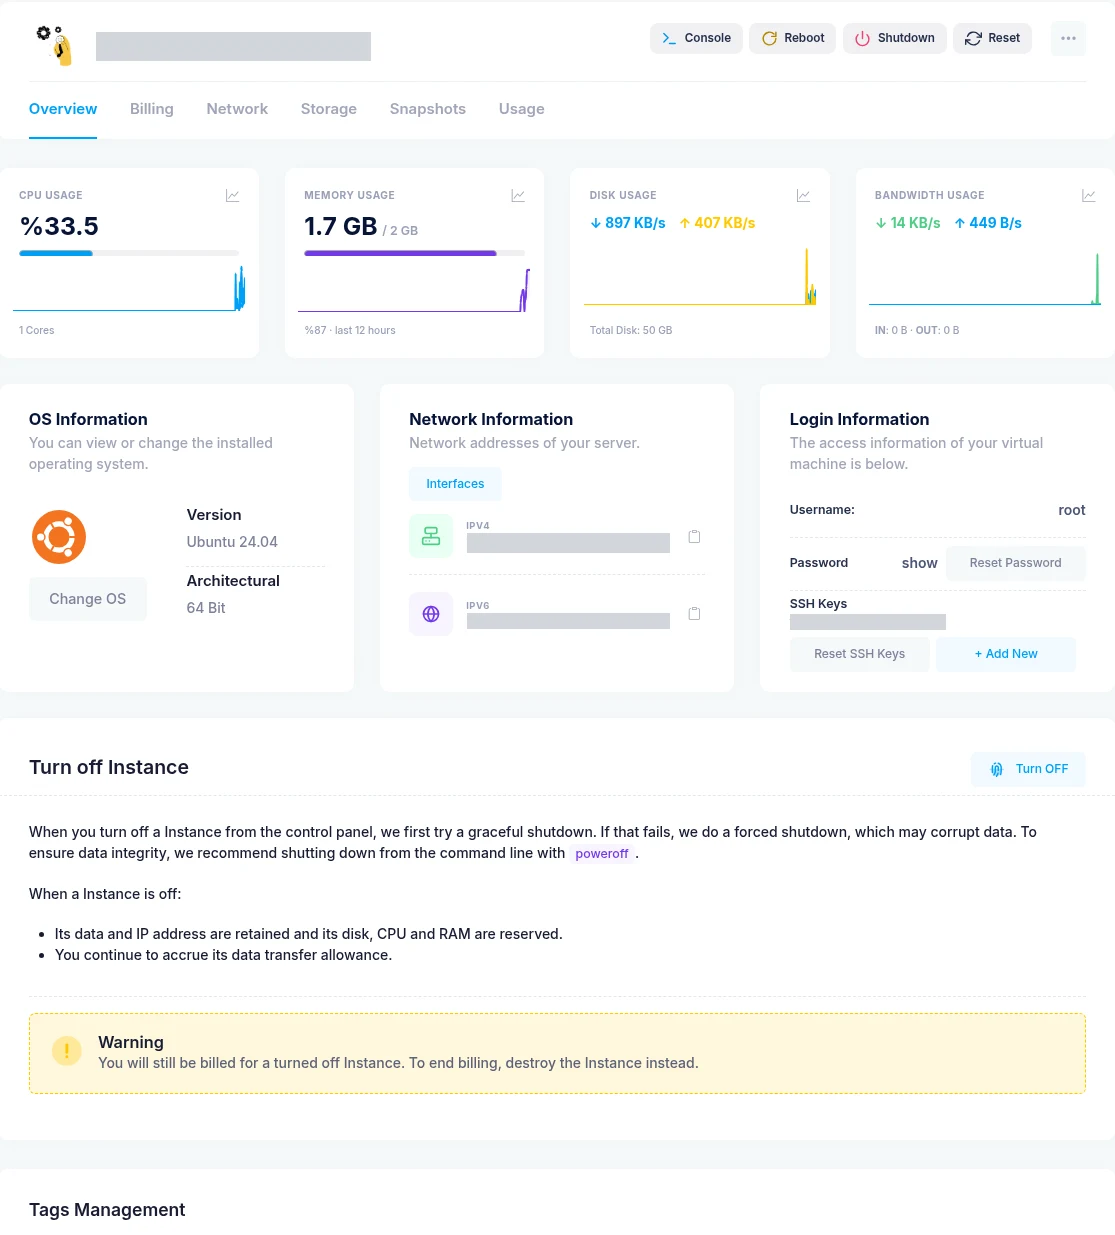
Continue with SSH access, the browser console or a snapshot before changing the server. Shutting a server down retains its resources and does not end billing.
Create an Instance in the API
For API operations, use the API reference and its current authentication and request schemas. This walkthrough validates the panel order above; it does not establish that an API order, a marketplace image or an additional volume was tested.
Screenshots are cropped from actual browser sessions. Account details and key material are redacted; the configuration screenshots were recaptured after the theme fixes without submitting a second order.