Instances Quickstart
FibaCloud Instances are Linux-based virtual machines (VMs) running on virtualized hardware. Every Instance you create is a new server that you can use independently or as part of a larger, cloud-based infrastructure.
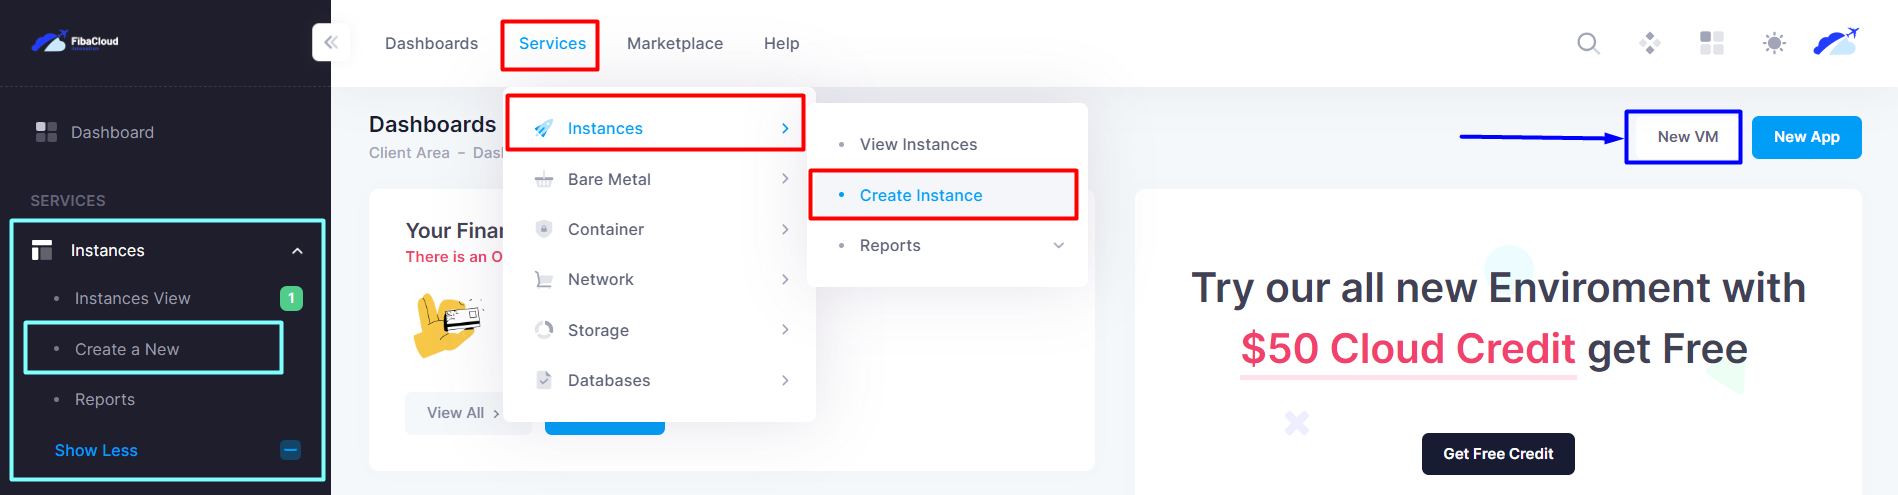
Create Instances
- The control panel has buttons in 3 different areas with a link to Create Instances. You can reach the creation page by clicking on any of them.
- Choose a Datacenter Region.
- Choose a plan and size for your Instance, which determines its RAM, disk space, and vCPUs as well as its price. Learn more about how to choose the right Instance plan.
- Choose an image, which can be a Linux distribution, container distribution.
The Instance create screen has a number of options after this, which you can customize now or after creation. To accept the defaults, scroll to the bottom and click Create VM. Otherwise:
- Optionally, add block storage.
- Choose an SSH key, or use a root password for the Instance.
- Choose a Payment Method and click Create VM. From here, you can follow our detailed guide on connecting to Instances with SSH, or follow the instructions below.
Connect to Instances
To connect by using a terminal on Linux, macOS, or Windows Subsystem for Linux:
- Open your terminal, and enter the command ssh
[email protected]Substitute in your Instances IP address after the@. The username isrooton most distributions. - Press ENTER and answer yes to the prompt that confirms the connection.
- If you are not using SSH keys, enter your password when prompted.
Windows users can alternatively connect with PuTTY. When you have logged in, your command prompt changes and you will see a welcome screen.
Destroy Instances
Destroying a Instances permanently and irreversibly destroys the Instance, its contents, automated backups, and any associated resources that you have selected to destroy along with the Instance.
- From the control panel, click the Instances View.
- Click the Instances you want to destroy.
- On the instances management page, click on the multi-option menu above.

- Click the Terminate button.
- The system will redirect you to the service cancellation page. From this page, select the reason for your cancellation, the type of cancellation and press the Request Cancellation button.
Depending on your cancellation type, your request will be processed automatically. If you have made a momentary mistake, contact support as soon as possible. Otherwise, deleted data cannot be recovered.